LIBPF® SDK Windows Installation manual
This is the installation manual for LIBPF® SDK (LIBrary for Process Flowsheeting Software Development Kit) version 1.1 on Microsoft Windows operating systems, for the model developer who wants to install a LIBPF® SDK she received, that has been packaged by a LIBPF® core developer.
Mandatory prerequisites
LIBPF® development on Microsoft Windows is supported on the following versions and platforms:
- Microsoft Windows 10 64-bit (amd64).
To develop models with the LIBPF® SDK, as a minimum you need:
-
One of the supported C++ compilers;
-
An Integrated Development Environment (IDE);
-
The boost C++ libraries
-
The Windows Subsystem for Linux (WSL)
Compiler
The supported C++ compiler and IDE is Microsoft Visual Studio. You can use Microsoft Visual Studio Community or Professional editions, and version 2019 or 2022. The instructions below are for the suggested edition / version: Microsoft Visual Studio Community 2022.
Alternatively you can use the C++ compiler from Microsoft Visual Studio, but Qt Creator as IDE - see instructions below.
In any case you’ll need the compiler, so here are the steps to install it.
-
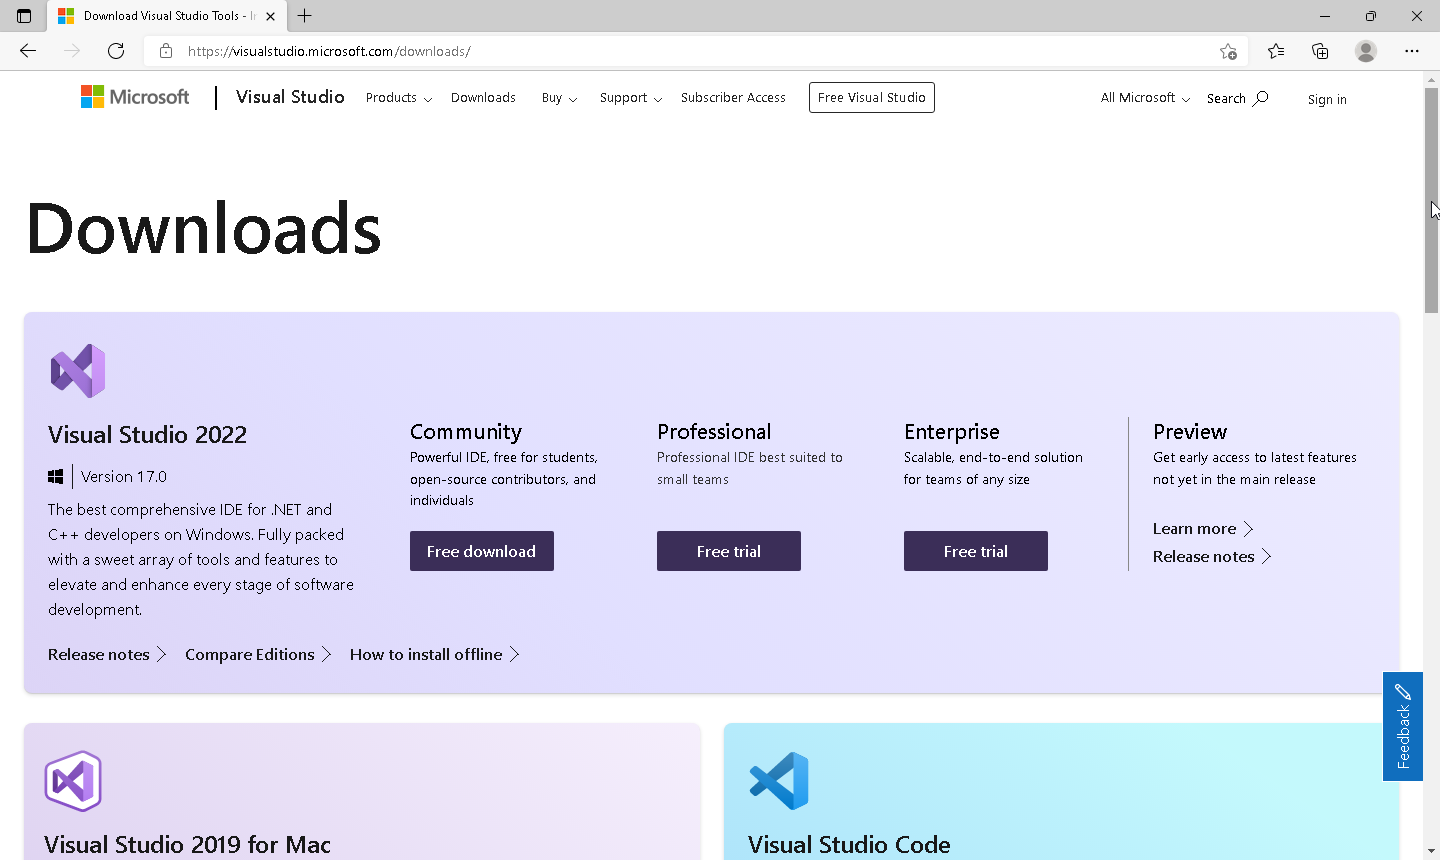
Get the downloader for the Community version from https://www.visualstudio.com/downloads/:
-
launch it (you may want to temporarily disable Windows Defender to ease the process)
-
acknowledge the User Account Control confirmation box:

-
Click on “continue” thereby accepting the license:

-
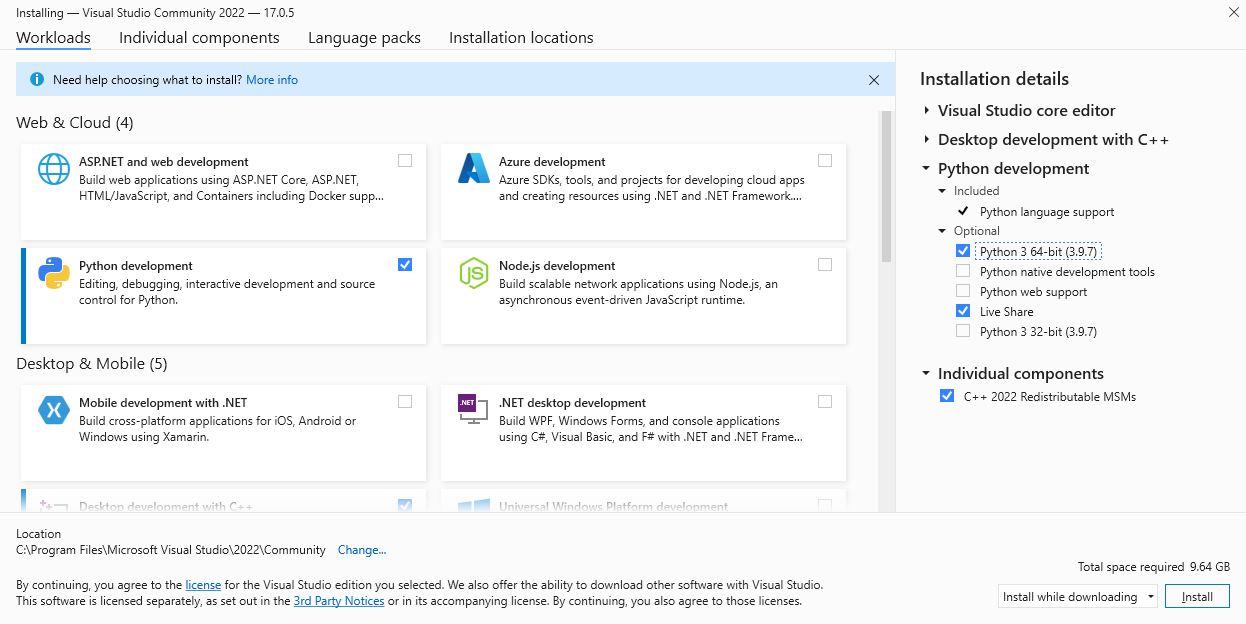
after a while the Workload selection window should come up, select::
-
in the “Workloads” tab:
-
from the “Web & Cloud” section choose “Python development” and tick the Optional component “Python 3 64-bit (3.9.7)”
-
from the “Desktop & Mobile” section select “Desktop development with C++” option, makings sure a stable “Windows 10 SDK” is selected
-
-
in the “Individual components” tab, search and tick the “C++ 2022 Redistributable MSMs” and “Git for Windows”
-
in the “Language packs” tab, make sure “English” is ticked
When you have everything selected:
click “install”, wait for the installation to finish (about 30 minutes) then close the installer.
-
For MSVC 2019:
-
in the “Workload selection” tab, from the “Web and Cloud” section choose “Python development”, and from the “Desktop and mobile devices” section select “Desktop development with C++” option, makings sure a stable “Windows 10 SDK” is selected
-
in the “Single Components” tab, search and tick the “C++ 2019 Redistributable MSMs”
-
in the “Language packs” tab, tick the “English Language Pack”, “Merge Modules” and “Python 3” and then click “install”:
After installing the Visual Studio IDE, make sure you install all the available updates for Visual Studio, then perform a Windows Update and apply the service packs and updates as suggested.
On first launch, this window will appear:
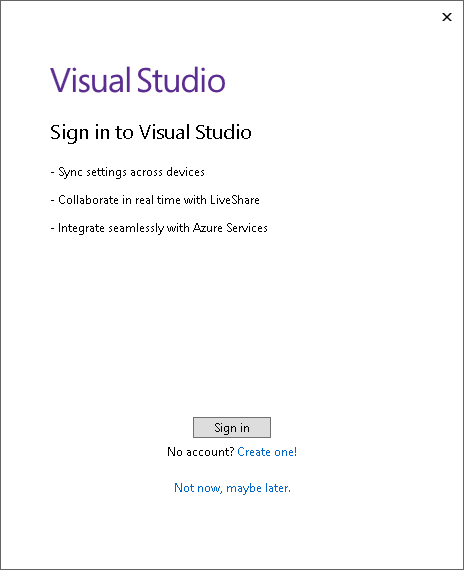
at this point you can safely select “Not now, maybe later” (Visual Studio 2019 only: also untick “Authenticate across all Azure Directories on sign-in”)
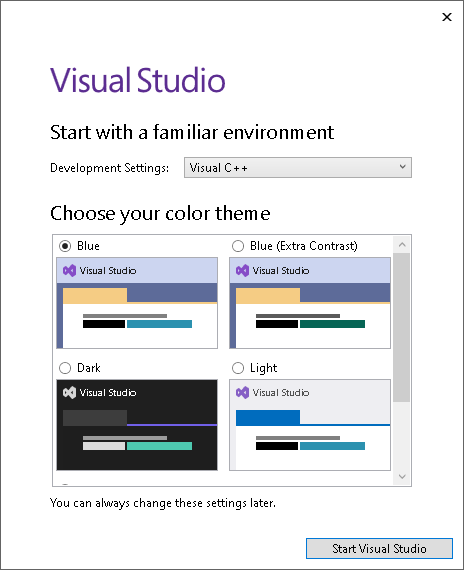
The next window sets up the environment, here the suggested settings are:
-
Development setting = Visual C++
-
Color theme: Blue
as in this screenshot:
Boost
Boost is a set of libraries for the C++ programming language. You can get them by downloading the boost libraries version 1.70 (preferred) from https://www.boost.org/ and extracting the archive in “C:\Program Files” as boost_1_70_0.
You can download them in other places, but make sure boost is in one of the canonical locations recognized by meson: Where boost documentation says it should be (C:\Program Files\boost\boost_*) or where boost built from source actually installs it (C:\\Boost) or where boost prebuilt binaries are (C:\\local\\boost_*).
LIBPF® relies on the include-only libraries for arrays, graphs and bimaps, so there is no need to build boost.
The include paths and the location of the boost-build system are set for boost versions 1.55 or 1.62 so if you install any other version you will need to manually fix them. Here is the direct download link for version 1.62: https://sourceforge.net/projects/boost/files/boost/1.62.0/. We suggest to download the boost_1_62_0.7z link.
Python
Make sure no Python version from the Microsoft Store or Visual Studio is installed. Download the Windows Installer (64-bit) from https://python.org/downloads and install it. Make sure both checkboxes (“Install launcher for all users” and “Add Python 3.x to PATH” are ticked).
WSL
The Windows Subsystem for Linux (WSL) is a compatibility layer for running Linux binary executables (in ELF format) natively on Windows 10 and Windows Server 2019.
Install it according to this guide, download and install Debian GNU/Linux from the Windows Store, then run inside bash:
sudo apt update
sudo apt upgrade
sudo apt install unzip git openssh-client unzip xz-utils bzip2 rsync shellcheck
Optional prerequisites
Depending on your requirements, there are more tools you might need.
To run your models
If you plan to test and debug the developed models on the development workstation, you also need to install one of the LIBPF® 1.1 demos, so that the it will setup the runtime prerequisites, the database and the ODBC / registry settings.
Make sure you install one of the demos with the same architecture of the SDK i.e. either 32-bit (x86) or 64-bit (amd64).
LIBPF® must also be activated, see the LIBPF® Activation Guide (English or Italian) for the rationale and the mechanisms of the activation system.
To create installers
If you plan to package and distribute your models in the form of runtime installers, you also need to install:
-
WiX - the Windows Installer XML toolset version 3.11 from https://wixtoolset.org/
-
NSIS (Nullsoft Scriptable Install System) version 3.06.1 from https://nsis.sourceforge.io/Main_Page
To enhance the User Interface or just use Qt Creator
If you plan to modify the open-source User Interface for LIBPF® (UIPF), or you just want to use the Qt Creator IDE, you will need the cross-platform application framework Qt version 5.13 or higher, available for free from https://www.qt.io/download; if a prebuilt version exists for your operating system, architecture and compiler combination, use that; if not, get the source and build it.
Alternatively you can get the Qt 5.x source and compile it:
-
Get the latest Qt 5 SDK for Open Source C++ development on Windows in source code from here; at the time of writing that is version 5.15.11; make sure to obtain the source-code, for example for 5.15.11 the file qt-everywhere-opensource-src-5.15.11.tar.xz from here
-
Extract to c:\qt-everywhere-opensource-src-5.15.11 then remove the qtwebkit* directories
-
open Visual Studio 2022 Command Prompt
-
make sure python 3 is in the path: type python –version you should get Python Version 3
-
configure Qt 5.x (see SQL Database Drivers - Building the Drivers - Compile Qt with a specific driver):
configure -debug-and-release -opensource -platform win32-msvc2013 -nomake examples -nomake tests -no-angle -opengl desktop -confirm-license -plugin-sql-odbc -
build:
nmake
To automate builds
The IDE is great for interactive editing and debugging, but if you need to automate builds and use a command line build system, you will need the bjam.exe tool from the boost build system v2. You can get it by performing just the first step of the boost installation (bootstrap); after that the bjam.exe will be present in the boost root – just copy it to a location in your path (i.e. in C:\Windows\SYSTEM32).
Get and install the LIBPF® SDK
Once you have set up the prerequisites, download the LIBPF® SDK from the link you have been supplied.
The LIBPF® SDK comes in a xz compressed tar archive (such as LIBPF_SDK_vs2013x86_1.0.xxxx.tar.xz); use the 7-Zip utility available from https://7-zip.org/ or any other equivalent tool to decompress to.
The LIBPF® SDK does not rely on absolute paths so you can decompress to any location, such as on the Desktop, at your profile’s root, in “C:\Program Files” or at the disk root C:.
Note: in the examples below, it is assumed the LIBPF® SDK has been moved to the desktop in a directory named LIBPF_sdk.
Testing your LIBPF® SDK install
The following procedures are for testing that the installation of the LIBPF® SDK on Microsoft Windows operating systems was successful.
LIBPF® kernel
By default the SaltPepper example is supplied as test case with the LIBPF® SDK.
The procedure to build and run it is different whether you use the command-line or one of the two Integrated Development Environments (IDEs) supported on Windows: Qt Creator or Microsoft Visual Studio.
Command-line
Follow this procedure:
-
Open a Git Bash shell, then move to the LIBPF® SDK location, for example:
cd ~/Desktop cd LIBPF_sdk -
enter the “pepper” sub-directory and compile the SaltPepper example with:
cd pepper bjam install-binnote: if your target platform is 64-bit, use this command to build:
bjam install-bin address-model=64 -
run it with:
bin/Qpepper new SaltPepper
Qt Creator as IDE
Install Qt then follow this procedure:
-
open the “pepper.pro” project file in the “pepper” directory by double-clicking
-
configure the project accepting the default Qt kit (we’re not using Qt anyway), for both debug and release configurations
-
build the project (Build -> Build Project “pepper”)
-
set “new SaltPepper” as run arguments in the left-hand-side Tab “Projects” just under “Debug”, then top tab “Running”
-
run it (menu Build -> Run)
Microsoft Visual Studio as IDE
Install Qt then follow this procedure:
-
open a Git Bash shell in the “pepper” directory, then generate the project file with qmake:
cd pepper /Qt/Qt5.5.5/5.5/msvc2013/bin/qmake -tp vc -
this command will generate the “pepper.vcproj” Visual Studio project file in the “pepper” directory; open it with Visual Studio by double-clicking
-
build the project (F7)
-
set “new SaltPepper” as run arguments in the Project properties -> Debug settings
-
run it (F5 or CTRL+F5 to prevent the console from closing on execution end).
User interface for LIBPF®
Open a Git Bash shell, browse to the directory where UIPF will be saved and clone the last version of UIPF from https://gitlab.com/simevo/UIPF:
cd your/directory
git clone https://gitlab.com/simevo/UIPF.git
This command will create a UIPF directory in your/directory.
In this UIPF folder double click on the UIPF.pro Qt Creator project file and set up the project:
-
Target Setup: Desktop
-
Create build configuration “Manually”
-
Use Shadow building
-
For each configuration set the ..\bin folder
-
Import build from …\UIPF
-
Create Build Configuration: “None”
-
Projects – Run Setting: Add a run configuration with the executable path pointing to the folder containg uipf\bin\Debug.UIPF\uipf_debug.exe.
Then build the User Interface for LIBPF®.
How to get on
-
For more information on how to use the LIBPF® SDK see the LIBPF® SDK manual and the LIBPF® SDK Developer manual
-
Follow one of the Model Developer step-by-step tutorials
-
Create a subfolder in LIBPF_sdk to put your own source code, adhering to the Source code directory structure standard, for example:
cd LIBPF_sdk mkdir project123 mkdir project123/src mkdir project123/include -
Start coding & have fun !