Step-by-step guide: adding new files to a LIBPF project
Reference documentation is great, but often boring to read and not helpful to solve specific problems that arise in day-to-day use. To tackle these, a step-by-step guide can be helpful.
Here is one such step-by-step guide for adding a new header/source file pair to LIBPF. This applies to the standard Microsoft Visual Studio 2008 project file (kernel.vcproj) shipped with the LIBPF SDK.
-
Add the header file to the project, selecting the command Add → New element from the context menu (RMB click) on the Header files folder of the project:

-
make sure you select Header file (.h), change the name, and make sure you put it in the include path (so that the compiler will find it):

-
In the new, empty header file, copy-paste the standard skeleton for a LIBPF header file:
/** @file newfile.h @brief Contains ..... @author (C) Copyright 2012 ..... */ #ifndef LIBPF_NEWFILE_H #define LIBPF_NEWFILE_H // SYSTEM INCLUDES // PROJECT INCLUDES // LOCAL INCLUDES // FORWARD REFERENCES // code .... #endif // LIBPF_NEWFILE_H -
Do a search and replace on the file to change the file name from newfile to whatever your file name is;
-
Do a search and replace on the file to change the header guard from LIBPF_NEWFILE_H to LIBPF_YOURFILENAME_H;
-
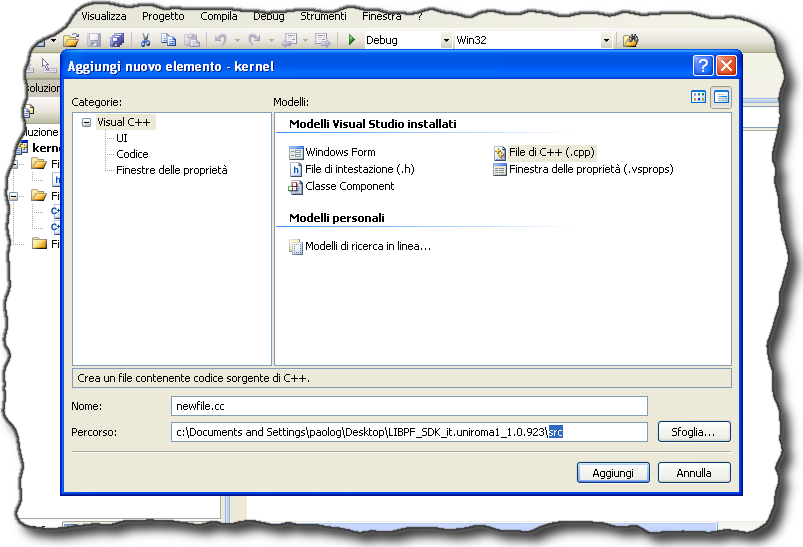
Add the source file to the project, selecting the command Add → New element from the context menu (RMB click) on the Source files folder of the project:

-
make sure you select C++ file (.cpp), change the name, and make sure you put in the src path where source files belong:

-
Copy-paste the standard skeleton for a LIBPF source file:
/** @file newfile.cc @brief Contains ..... @author (C) Copyright 2012 ..... */ // SYSTEM INCLUDES // PROJECT INCLUDES // LOCAL INCLUDES #include "newfile.h" // FORWARD REFERENCES // code .... -
Finally, do a search and replace on the file to change the file name from newfile to whatever your file name is.